Modal django forms with bootstrap 4
You can also be interested in:


Some time ago' I wrote an article about how to implement django forms with bootstrap 3 modals. It turned out to be a quite interesting theme since many people surfed and read that page. So now I'll refresh these concepts changing them a bit, in fact we'll see how to implement django forms with bootstrap 4-alpha modals.
Aperitif
Some preliminary stuff.
I'm almost bored with overwriting the model form class of my generic view in order to add bootstrap classes to form fields, so I'll use django-widget-tweaks. Let's install it:
(.virtualenv)$ pip install django-widget-tweaks
Add widget_tweaks to your installed apps.
The template with the modal and the show modal button
In my case this is a inclusion tag template, but in general you should have 4 things:
{% comment %}1 - This js which allows to submit forms through ajax and must be loaded in the page{% endcomment %}
{% block extra_js%}
    <script src="http://malsup.github.com/jquery.form.js"></script>
{% endblock %}

{% comment %}2 - The button which shows the modal, notice the href attribute{% endcomment %}
<p>Click <a data-toggle="modal" data-target="#modal" href="{% url 'news-create' %}">here</a> to show the modal</p>

{% comment %}3 - The modal container{% endcomment %}
<div class="modal fade" id="modal"></div>

{% comment %}4 - This js code will load the response from the href url of the showing button inside the modal{% endcomment %}
<script>
$('#modal').on('show.bs.modal', function (event) {
    var modal = $(this)
    $.ajax({
        url: "{% url 'news-create' %}",
        context: document.body
    }).done(function(response) {
        modal.html(response);
    });
})
</script>
With bootstrap 3 we didn't need to call $.ajax because the bootstrap js did it for us, but things changes.
Remember to configure your app urls and to create the view (we'll see the view code later):
urls.py
from django.conf.urls import patterns,url
from .views import NewsCreateView

urlpatterns = patterns('news.views',
    url(r'^create/$', NewsCreateView.as_view(), name='news-create'),
)
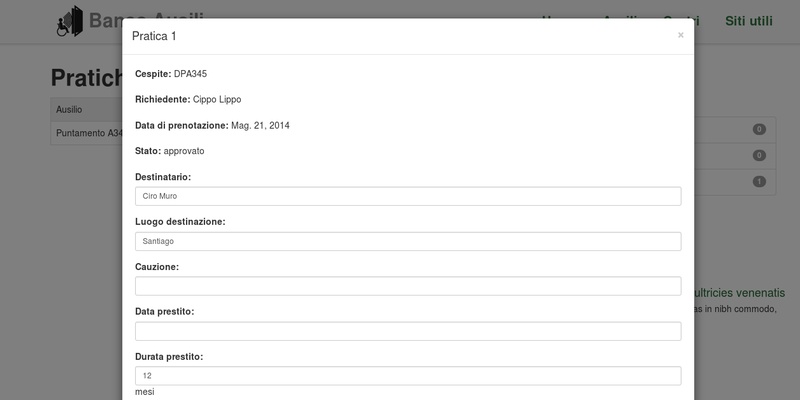
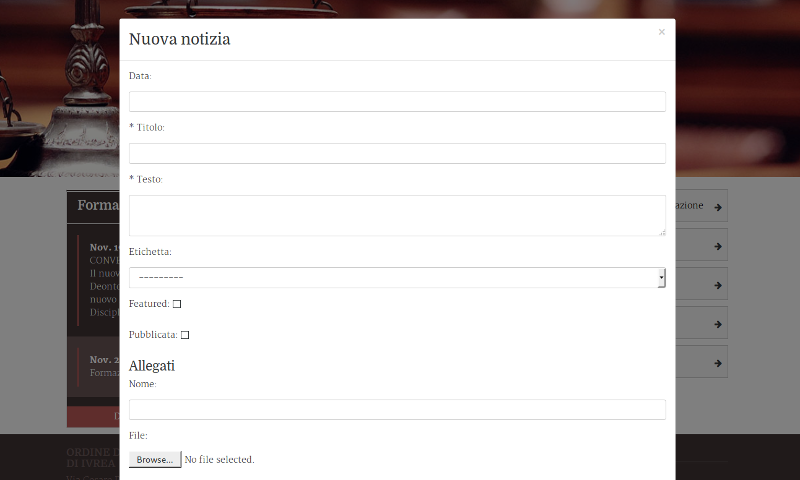
The template which contains the form
Our form is rendered inside a template (the one used by the generic CreateView), and contains the bootstrap's modal code (except the container). It also contains the js code which submits the form using an ajax request.
{% load i18n widget_tweaks %}
<div class="modal-dialog modal-lg" role="document">
    <form action="{% url 'news-create' %}" method="post" id="news-create" class="form">{% csrf_token %}
        <div class="modal-content">
            <div class="modal-header">
                <button type="button" class="close" data-dismiss="modal" aria-label="Close">
                    <span aria-hidden="true">×</span>
                    <span class="sr-only">Close</span>
                </button>
                <h4 class="modal-title">Add News</h4>
            </div>
            <div class="modal-body">
                {{ form.media }}
                {% for field in form.visible_fields %}
                    <fieldset class="form-group">
                        <label for="exampleInputEmail1">
                        {{ field.label_tag }}
                    </label>
                    {{ field|attr:"class:form-control" }}
                </fieldset>
                {% endfor %}
            </div>
            <div class="modal-footer">
                <button type="button" class="btn btn-secondary" data-dismiss="modal">Close</button>
                <input type="submit" class="btn btn-primary" value="Save changes" />
            </div>
        </div><!-- /.modal-content -->
    </form>
</div><!-- /.modal-dialog -->
<script>
    var form_options = { target: '#modal', success: function(response) {} };
    $('#news-create').ajaxForm(form_options);
</script>
As you can see we use the django-widget-tweak plugin to add the 'form-control' class to the inputs. The form is submitted through ajax thanks to the 'jquery.form.js' library and the response is inserted directly inside the $('#modal') container, refreshing the modal content.
Now the CreateView must behave this way:
- if the form is invalid, return the same form with error printed
- if the form is valid, save the data and then return some sort of successful response with a js code which closes the modal after x seconds
from django.views.generic.edit import CreateView
from django.shortcuts import render

from .models import News

class NewsCreateView(CreateView):
    model = News
    fields = '__all__'

    def form_valid(self, form):
        self.object = form.save()
        return render(self.request, 'news/news_create_success.html', {'news': self.object})
The successful template may look like this:
<div class="modal-dialog modal-lg" role="document">
    <div class="modal-content">
        <div class="modal-header">
            <button type="button" class="close" data-dismiss="modal" aria-label="Close">
                <span aria-hidden="true">×</span>
                <span class="sr-only">Chiudi</span>
            </button>
            <h4 class="modal-title">Inserimento notizia</h4>
        </div>
        <div class="modal-body">
            <p class="alert alert-info">The news "{{ news.title }}" was succesfully inserted!</p>
        </div><!-- /.modal-body -->
     </div><!-- /.modal-content -->
</div><!-- /.modal-dialog -->
<script>
    // close the modal after 3 seconds
    setTimeout(function() {
        $('#modal').modal('hide');
    }, 3000);
</script>
Summary
We show a bootstrap modal by clicking over a link. The content of the modal is the response coming from an ajax request. The form rendered inside the modal is submitted through ajax. The view response overwrites the form code and display errors if the validation fails, otherwise returns a successful response with a timeout which hides the modal after 3 seconds.
Your Smartwatch Loves Tasker!

Your Smartwatch Loves Tasker!
Featured
Django admin and bootstrap 5
Bootstrap 5 has come, currently in beta release, and seems already very stable.
So the question is: are you looking for ...

About code optimization, learn from exercises
Let's see an example of exercise you can face during a job interview, and let's use it to understand some ...

Notes on the Pearson correlation coefficient
The Pearson correlation coefficient is a measure of the linear correlation between two variables X and Y. It has a ...
Archive
- 2021
- 2020
- 2019
- 2018
- 2017
- Nov
- Oct
- Aug
- Jun
- Mar
- Feb
- 2016
- Oct
- Jun
- May
- Apr
- Mar
- Feb
- Jan
- 2015
- Nov
- Oct
- Aug
- Apr
- Mar
- Feb
- Jan
- 2014
- Sep
- Jul
- May
- Apr
- Mar
- Feb
- Jan
- 2013
- Nov
- Oct
- Sep
- Aug
- Jul
- Jun
- May
- Apr
- Mar
- Feb
- Jan
- 2012
- Dec
- Nov
- Oct
- Aug
- Jul
- Jun
- May
- Apr
- Jan
- 2011
- Dec
- Nov
- Oct
- Sep
- Aug
- Jul
- Jun
- May